User guide - Glowind
Buy NowThis theme is delivered with a theme plugin and NopAdvance Core plugin, and both plugins must be installed in order for this theme to work properly.
Please see the plugin installation guide before proceeding with the theme setup. We recommend configuring the theme plugin before you select glowind as your store working theme.
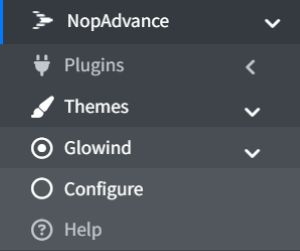
Once the theme plugin has been installed, navigate to NopAdvance > Themes > Glowind in your nopCommerce admin menu, as shown in the below image.
Clicking on the Configure menu item will redirect you to the plugin configuration page as displayed below.

The settings from the configuration page are explained below:
Common
- Enabled: Check to enable the plugin for your nopCommerce store. Please note, some theme features may not work properly unless the plugin is enabled for the store where this theme is being used
- Home Page Layout: You can select the homepage design style.
Options visible:
- Layout One & Layout Two
- Each layout changes how banners, categories, and products appear on the homepage.
- Remove copyright: Check to remove the nopCommerce copyright notice only, if you have already purchased a copyright removal key from here and adhere to the nopCommerce license terms.
- Remove "Designed by NopAdvance": Check to hide developer credits for NopAdvance in your website footer.
- Enable Category Banner: This option allows the theme to display a banner image on category pages. Enabled category pages will show a banner at the top.
- Logo: Define the store logo.
- Footer Logo: define the footer logo image.
- Community Poll Background Picture: This allows you to upload a background image for the community poll section. The image will appear behind the poll area on the website. This helps make the poll section more visually attractive.
- Custom head styles: Write any custom styles (CSS) to apply to the theme. This is intended for developers and advanced users.
- Show payment card on footer: Check to display payment card icons (e.g., Visa, MasterCard) in the footer.
- Footer payment card logo: Upload an image to represent the payment methods.
- Login Picture: This option allows you to upload a custom image for the login page. The image will be displayed on the customer login screen, improving the visual appearance of the page.
- Register Picture: This option allows you to upload a custom image for the registration page. The image will appear when users create a new account.
Note:
- All settings support multi-store configuration.
- Features of this plugin will only work with the glowind theme from NopAdvance.