Cron-jobs Management - Hosted Cron-Jobs
Buy NowManaging and adding cron jobs in Cron-Job.org using the Hosted Cron Jobs plugin for nopCommerce is a straightforward process. This guide will walk you through the steps required to configure your scheduled tasks for advanced management and execution using Cron-Job.org.
Step 1: Access the Hosted Cron Jobs Plugin in nopCommerce
- Navigate to the Plugin List:
- In your nopCommerce admin panel, go to NopAdvance > Plugins > Hosted cron-jobs > List.
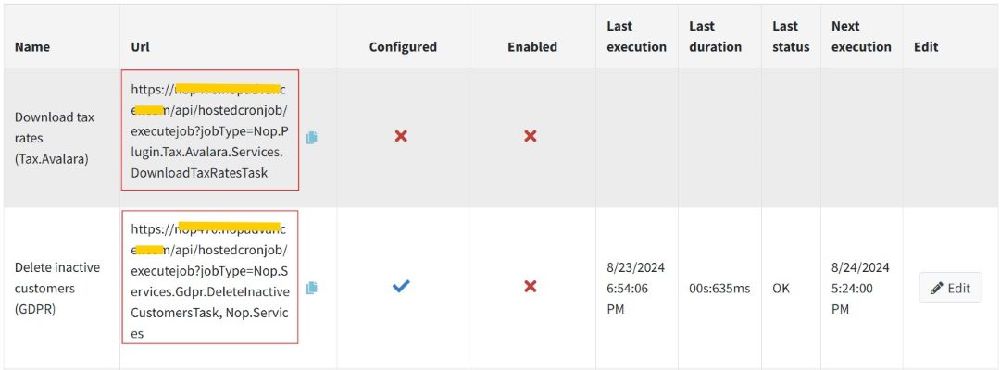
- Here, you will see a list of all scheduled tasks that are available in your nopCommerce store.
- Select the Task You Want to Configure: Review the list and identify the scheduled task you want to manage using Cron-Job.org. The list provides the task name, URL, and current status (Configured, Enabled, etc.).
Step 2: Create a Cron Job in Cron-Job.org
- Log in to Your Cron-Job.org Account: If you don’t have an account, sign up at Cron-Job.org.
- Navigate to API Key Management:
- Go to Settings > API Keys.
- If you haven’t done so already, create an API key by selecting Create API Key and copy it.
- Configure the newly created API key in the Hosted Cron-jobs plugin configuration page.
- Create a New Cron Job:
- Go to Cronjobs and select Create New Cronjob.
- In the URL field, paste the URL provided in the nopCommerce Hosted Cron Jobs plugin list for the scheduled task you want to configure.
- Configure Advanced Settings:
- Navigate to the Advanced tab.
- Headers: Add a header with the key cron-job-key and the value as the Authentication Key provided in your nopCommerce plugin configure page settings. This step is crucial for security, ensuring that only authorized requests trigger the scheduled tasks.
- Set the Request Method to POST.
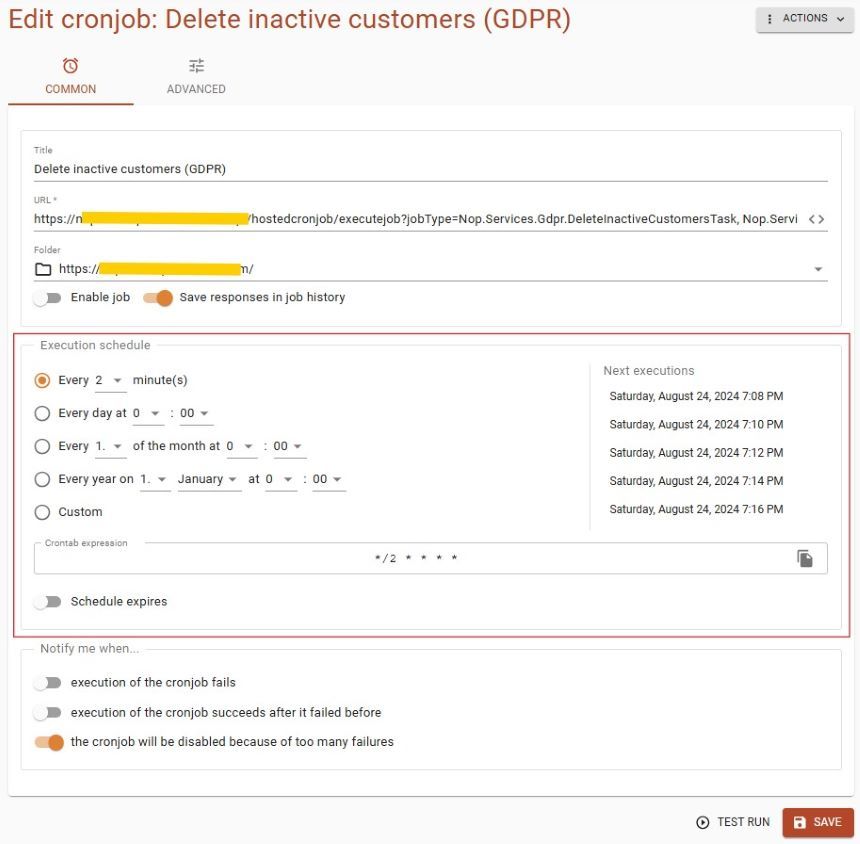
- Set the Schedule: Define when and how often you want the task to execute. You can set specific intervals, times, or dates, offering far greater flexibility than nopCommerce’s default scheduled tasks.
- Enable the Cron Job: Once all details are configured, save and enable the cron job. The Configured and Enabled status will be reflected back in your nopCommerce Hosted Cron Jobs list, confirming the task is ready to run as scheduled.
Step 3: Disable the Task in nopCommerce’s Default Scheduled Tasks
- Avoid Conflicts:
- To prevent the task from running simultaneously in both nopCommerce and Cron-Job.org, navigate to the default scheduled tasks page in nopCommerce.
- Disable the same scheduled task there to ensure it is only executed through Cron-Job.org.
Step 4: Monitor and Manage the Task
- Monitor Execution Status: In your Hosted Cron Jobs plugin list page, you can monitor the last execution time, duration, status, and the next scheduled execution for each configured cron job.
- Editing the Cron Job: If you need to adjust settings, go back to Cron-Job.org and make the necessary changes. Additionally, the plugin will soon support more extensive editing directly from the nopCommerce admin panel.
By following these steps, you can effectively manage your scheduled tasks with the advanced flexibility provided by Cron-Job.org, ensuring that your nopCommerce store runs smoothly and efficiently. This setup is perfect for tasks that require specific timing or more complex scheduling needs than what is available through the default nopCommerce system.
Step 5: Access Execution History in Cron-Job.org
- Review Execution History:
- To gain insights into the performance and reliability of your scheduled tasks, you can review the execution history directly within your Cron-Job.org account.
- Navigate to the Cronjobs section and select the specific cron job you want to examine.
- Under the History tab, you'll find detailed logs showing when the task was executed, the response time, and whether the execution was successful or encountered any issues.
- This historical data is invaluable for troubleshooting, optimizing task performance, and ensuring that your scheduled tasks are running as expected.

By regularly reviewing the execution history, you can maintain a high level of control over your cron jobs, making adjustments as necessary to keep your nopCommerce store running smoothly.