Plugin Guide - Admin Layout Changer
Buy NowTable of contents
Configure
Once you click on the Configure menu item as described in previous step, It will display the configuration page as shown in the image below.
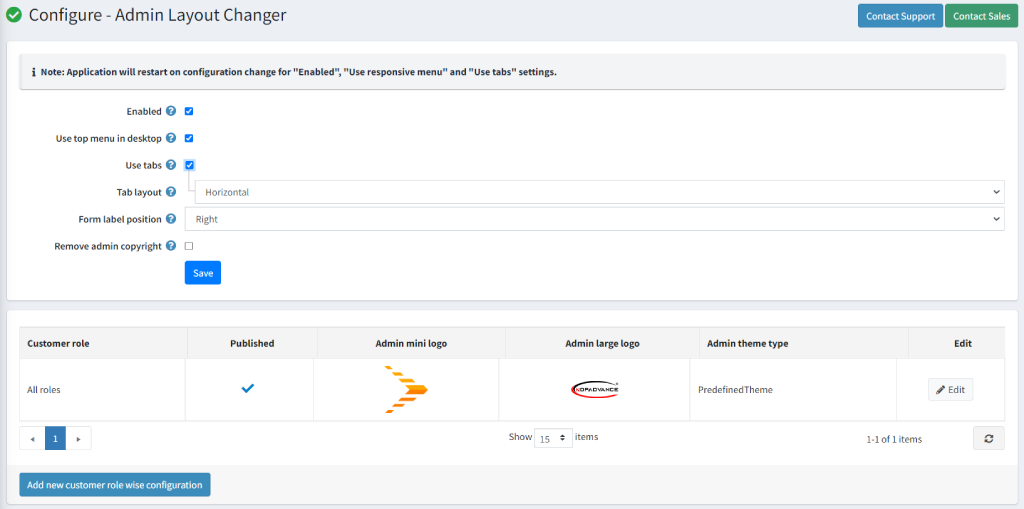
The above settings are explained below:
- Enabled: You can enable the plugin using this setting. This will restart the application on the change of this setting.
- Use top menu in desktop: You can enable the top menu for the admin website using this setting. In the case of the desktop view the menu will be displayed on the top whereas, in the case of the mobile view, the menu will get back to the left side menu. Changing this setting will restart the application.
- Use tabs: Enable this setting if you want to display tabs instead of panels in horizontal or vertical as displayed below image on all the edit pages and configuration pages. It will restart the application on the change of this setting.
- Tab Layout: After enabling the Use tabs you can see another setting which tab layout. You can select the tab layout as Horizontal or Vertical whichever is preferable.
- Form label position: With this setting, you can select the Form label position. You can select between left and right whichever is preferable to you.
- Remove admin copyright: Enabling this setting will remove the copyright message from the admin footer.
- Add new customer role wise configuration: Add role-wise configuration for the admin role. You can check the role-wise configuration below.
Role-wise configuration(Back to top)
Once you click on the Add new customer role wise configuration button, it will display the role-wise configuration pop-up as shown in the image below.
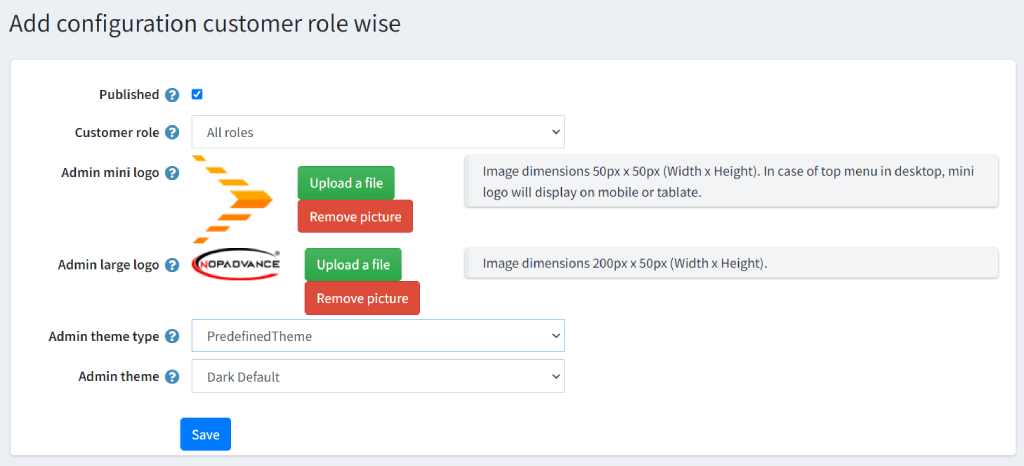
- Published: Click the published button to publish the role-wise configuration.
- Customer role: Admin can configure the settings per customer role or common for all customer roles so the look and feel or settings of the admin website can be applied as per configuration for the configured customer roles.
- Admin mini logo: This setting allows the user to set the logo for the admin when the admin menu is slider left.
- Admin large logo: This setting allows the user to set the logo for the Top-left corner of the admin panel.
- Admin theme type: Selected an admin theme type for your admin panel.
- Admin theme: In this dropdown, you can see the pre-defined themes.
- Predefined theme: If this option is selected, then you can select the themes which are added default by us.
- Custom theme: If this option is selected, you can customize your admin panel as per your requirements. You can set primary color, secondary color, and font color as per your choice.