Plugin User Guide for - Quick Order
Buy NowThe nopCommerce Quick Order Plugin is a valuable tool for any store that handles bulk orders or serves wholesale customers. It makes the ordering process faster, easier, and more efficient, improving customer satisfaction and increasing sales. With features like menu configuration, product validation, SEO support, and Excel upload, the plugin provides everything needed for a seamless bulk ordering experience.
By following this guide, store owners can easily configure the plugin in the back-end and offer a smooth, hassle-free ordering process for their customers on the front-end.
To install the Quick Order Plugin, follow these simple steps:
1. Download the Plugin: Start by downloading the plugin from the NopAdvance plugin store or skip this step if the plugin is already added to your store.
2. Install the Plugin:
- This plugin is delivered with NopAdvance Core plugin since this plugin is dependent on our Core Plugin. You need to install the plugin using the plugin installation guide provided here.
- Once installed, the plugin will be active and ready for configuration.
3. Activate the Plugin: After installation, navigate to NopAdvance > Plugins > Quick order > Configure in your nopCommerce admin menu, to enable the plugin and start the setup process.
Configuring the nopCommerce Quick Order Plugin
Once the plugin is installed and activated, you need to configure it according to your store’s needs.
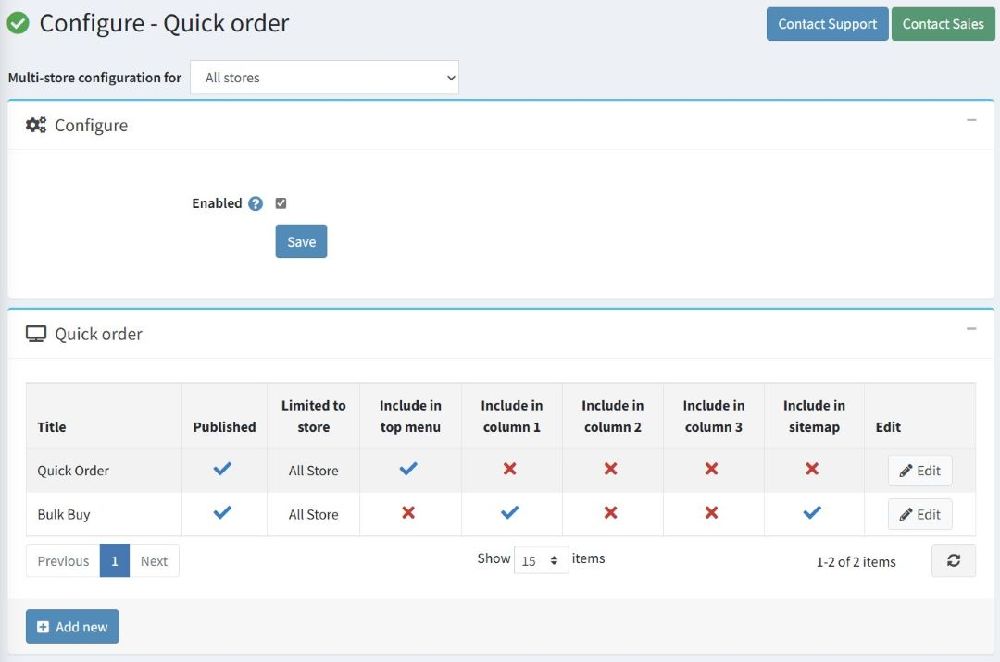
- Multi-store Configuration: The Quick Order plugin supports enabling it for multiple stores by selecting the store from the Multi-store configuration dropdown at the top of the page.
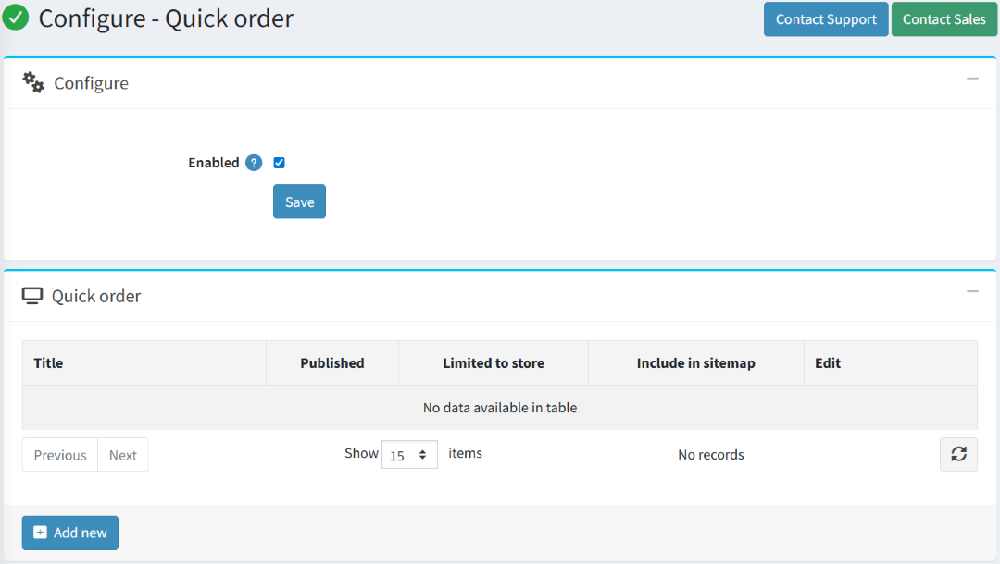
- Enable or Disable the Plugin: You will see a toggle checkbox option to enable or disable the plugin for your selected store. Ensure that the plugin is enabled so that the Quick Order functionality is visible to your customers.
Refer to the screenshot showing the plugin enable option in the configuration.
Supported version's nopCommerce 4.80.x and lower
Supported version's nopCommerce 4.90.x and above
Configure Quick Order Pages
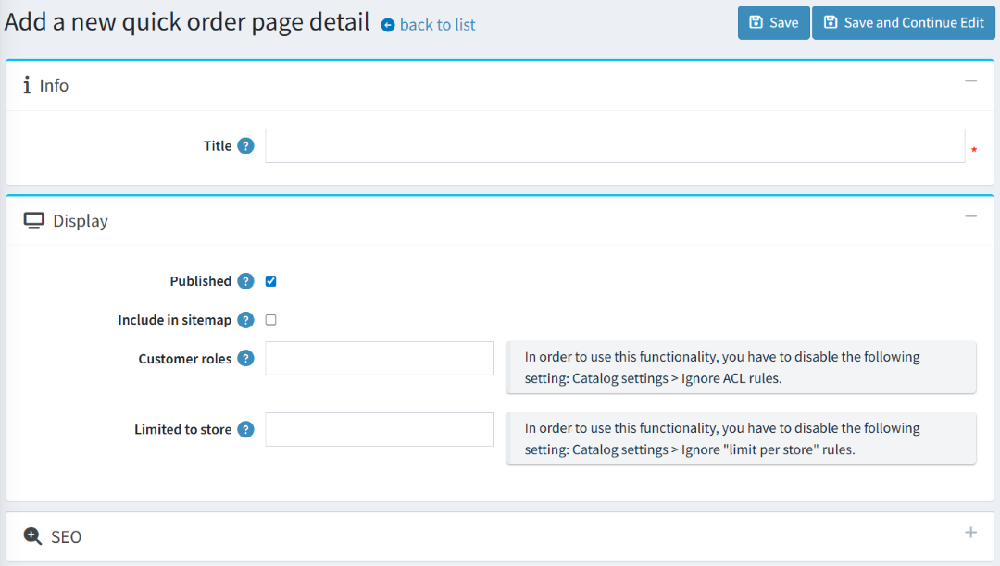
Under the Quick Order section, you can configure individual quick order pages. You can:
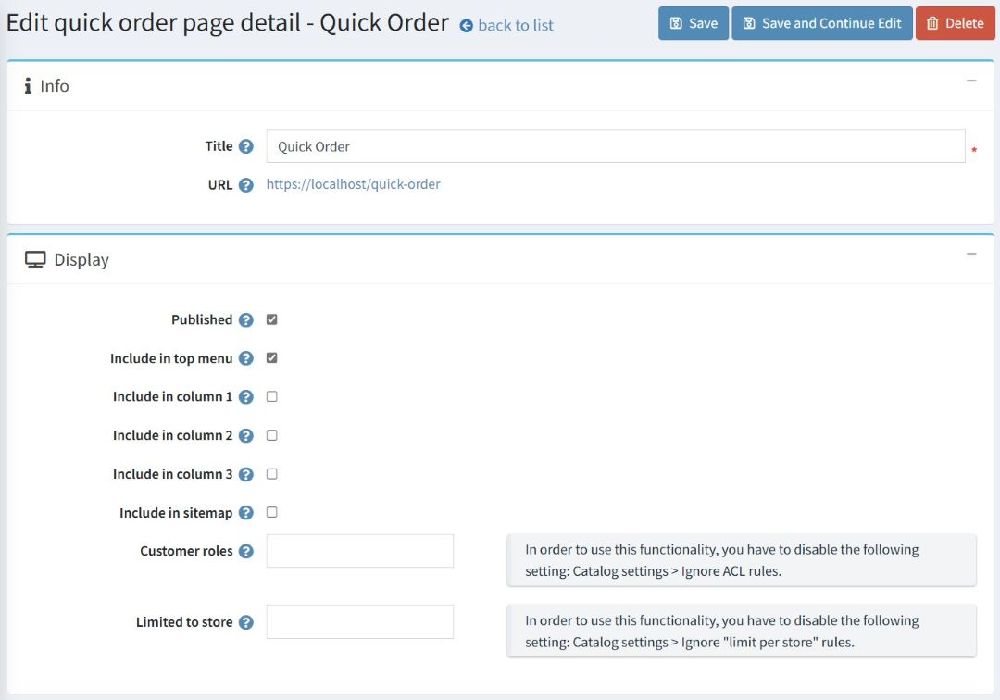
- Title: Set the title for the quick order page.
- URL: Define the SEO-friendly URL for the quick order page (e.g.,
/quick-order). - Published: Toggle whether the quick order page is visible to your customers.
- Menu Placement: You can include the Quick Order link in the Top Menu or any of the columns in the footer by selecting the relevant options.
- Store Selection: You can create quick order page for more than one stores with different menu name and URL such as
Bulk Order, /bulk-orderfor Store One andQuick Order, /quick-orderfor Store Two. - Sitemap: Choose to include the page in your sitemap for SEO benefits.
- Customer Role Limitation: You can restrict the Quick Order functionality to specific customer roles, such as wholesale or VIP customers. This ensures that the bulk ordering tool is only accessible to the customers who need it.
Refer to the screenshot showing the backend configuration of the Quick Order page.
Supported version's nopCommerce 4.80.x and lower
Supported version's nopCommerce 4.90.x and above
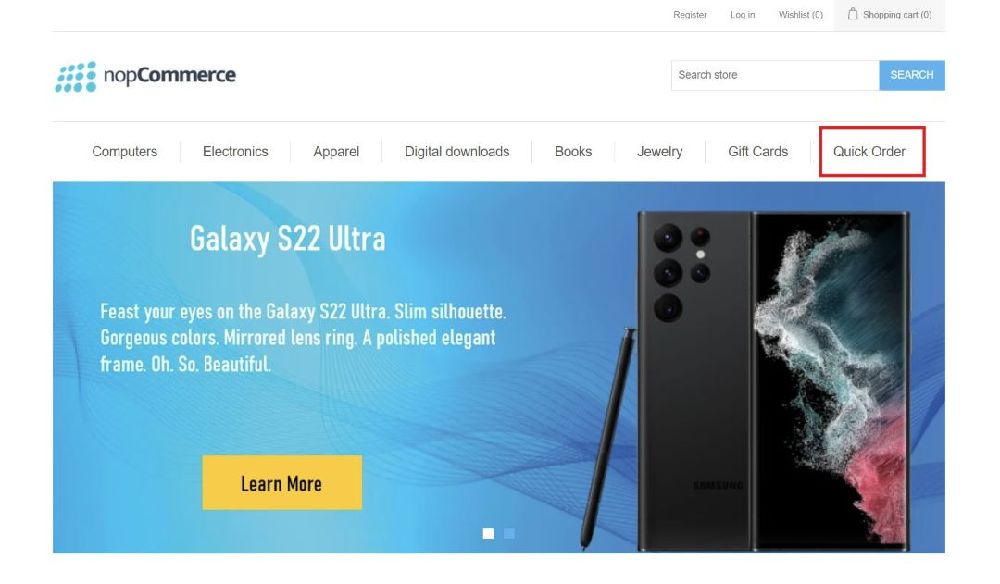
How to Display the Quick Order Menu in 4.9
To display the Quick Order link on your storefront menu or footer coloum, you need to manually add it using nopCommerce’s menu management options:
- Add the Quick Order link to the Main Menu, Footer Columns, or any other desired menu location.
Important Note
This change is specific to nopCommerce 4.9 and later versions. For versions 4.8 and below, the plugin still supports adding the Quick Order menu directly from the plugin configuration page.
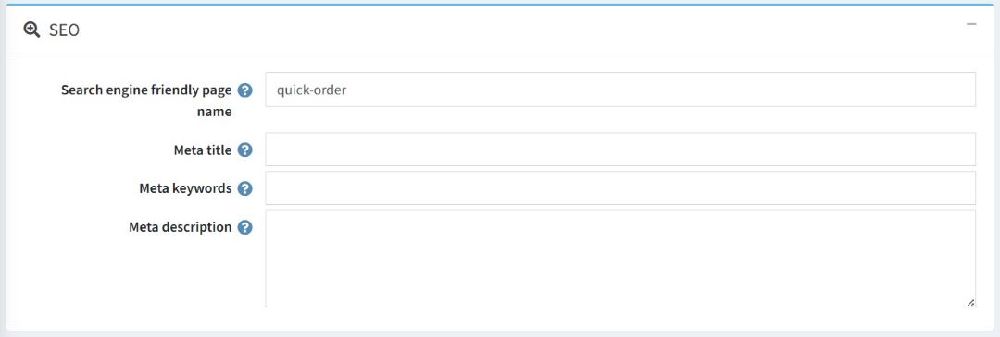
SEO Configuration
To optimize your Quick Order page for search engines, you can enter SEO-friendly details under the SEO section. Define the search engine friendly page name, meta title, meta keywords, and meta description to improve your page's visibility in search results.
Refer to the screenshot showing the SEO configuration page.
Front-End Functionality
Here’s how the Quick Order functionality works on the front-end:
Quick Order Form
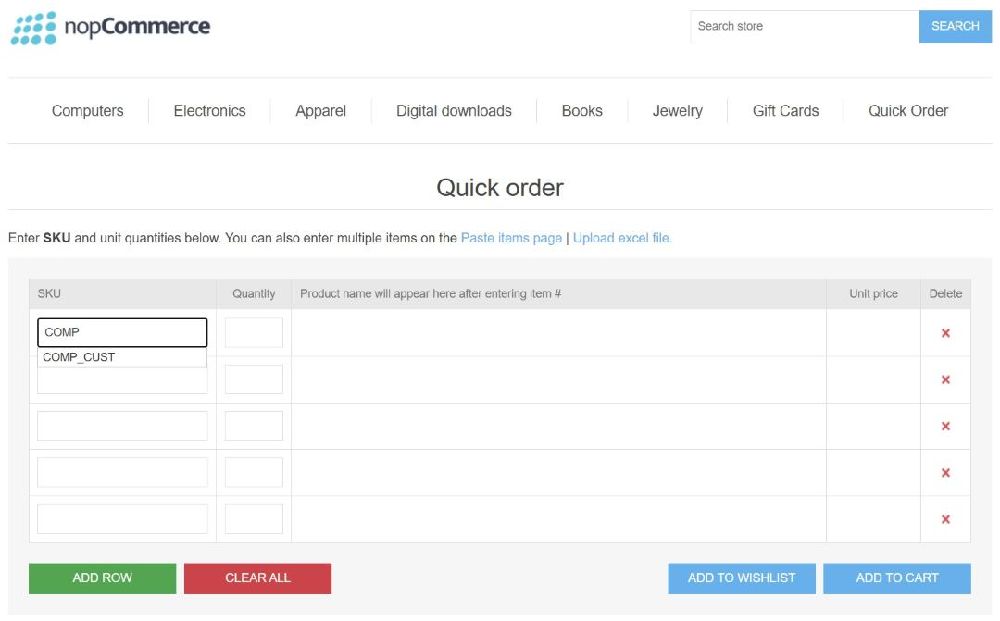
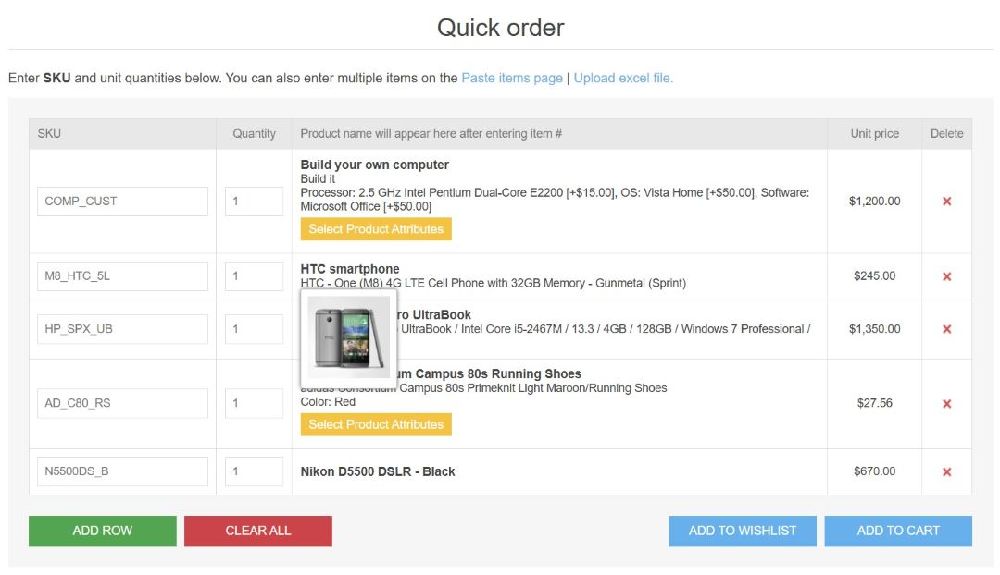
Customers can access the Quick Order page from the menu. Once on the page, they are presented with a form to enter SKU and Quantity for the products they wish to purchase. The form automatically completes the product name as soon as a valid SKU is entered, making it easy for customers to fill out the form even if they don’t remember the exact SKU.
Refer to the screenshot showing the Quick Order form.
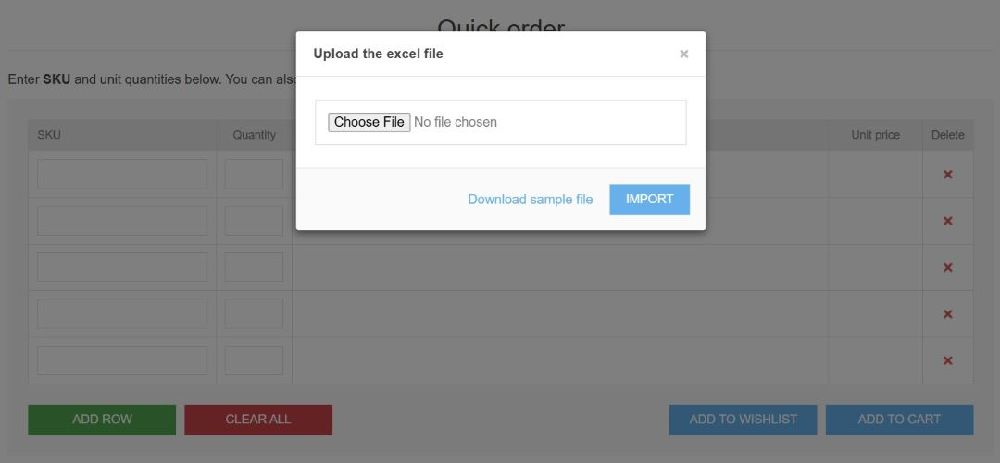
Bulk Ordering with Excel
The plugin also provides an option for customers to upload an Excel sheet with the SKU and quantity for each product. This is especially useful for wholesale customers who already have their bulk orders prepared in a spreadsheet.
Refer to the screenshot showing the Excel upload functionality.

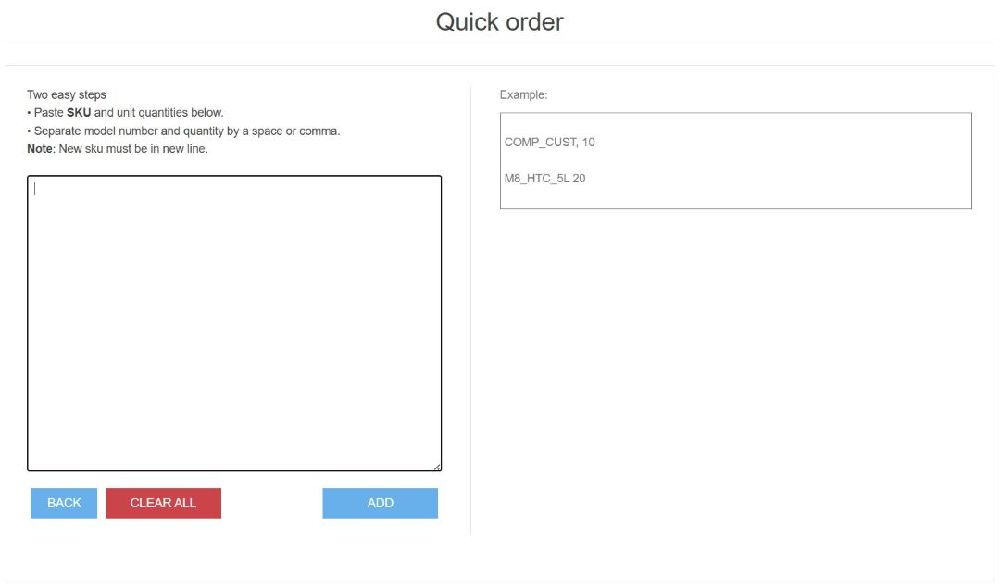
Bulk Ordering with Paste Item Page
In case you have a list of items you want to order but not in excel format, you can simply use the paste items page to copy paste / write product SKU and quantity in a text format and paste it in the provided box on this page to automatically add products to the quick order nopCommerce plugin.
Refer to the screenshot showing the Paste Items Page.
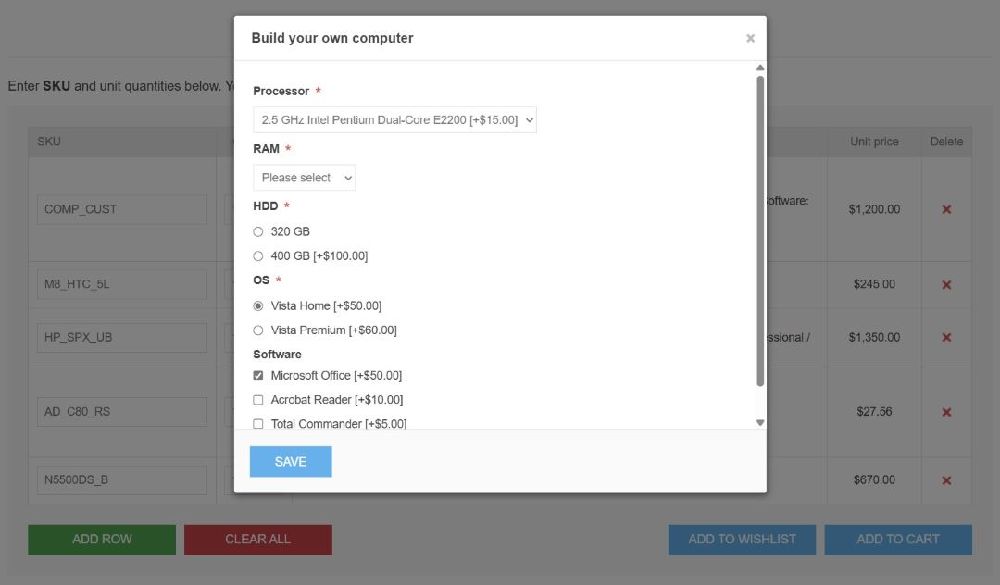
Product Attributes and Validation
If a product has attributes (e.g., size, color), the plugin prompts the customer to select the required options before proceeding. This ensures the order is valid and ready for checkout. Product quantity is also validated to prevent over- or under-ordering.


Clear All, Add Row and Add to Cart / Wishlist
The customer can add as many rows they want to the quick order form since there is no limitation in adding rows on the form. Once all the products are added to the form, customers can either add the products to their cart or wishlist. There is also an option to clear all rows if they want to start over. This gives customers flexibility and control over their bulk ordering.