Applications - Plugin Guide
Buy NowOn this page, you have the capability to establish multiple applications, each associated with a specific nopCommerce store according to your requirements. Each application is assigned a distinct API key, and you have the flexibility to generate numerous applications for each store as necessary.
An application within the public API plugin is intricately connected to a store and its corresponding real-world website, each with a unique domain. The application-level API key serves as the authorization mechanism for API methods, regardless of whether they necessitate JWT access token authorization. For instance, the `GetGuestToken` method, which facilitates the creation of a guest customer access token, does not require an access token.
Additionally, store information is integrated into the application API key, underscoring the necessity of including this key in all request headers. This ensures that the plugin can accurately validate the store and the request URL, thereby determining from which source the requested information should be dispatched.
Upon selecting the Applications menu item, you will be directed to the applications page, which is visually represented in the image provided below.
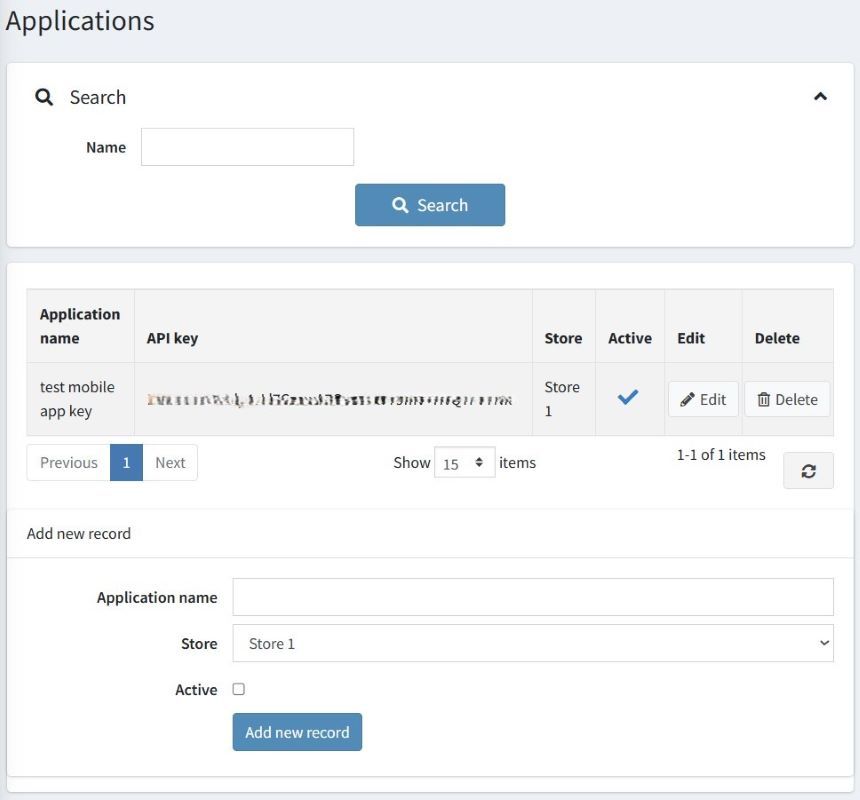
To create a new application, you'll need to fill in the following details:
- Application Name: This serves as the identifier for the application. It's used solely for distinguishing between multiple applications within your setup and does not interact with the API. The application name can be modified at any time.
- Store: Specifies the nopCommerce store that the application will be associated with.
- Active: This toggle allows you to activate or deactivate the application. This adjustment can be made directly from the overview grid. Deactivating an application renders all requests using its API key in the header invalid.
Should you encounter an "Invalid key" error while utilizing the key in Postman, the issue often stems from an incorrect Host Value. To correctly set the Host value, navigate to Configuration > Stores > Edit Store. Here, you'll find a setting for the Host Value, depicted in the provided image.
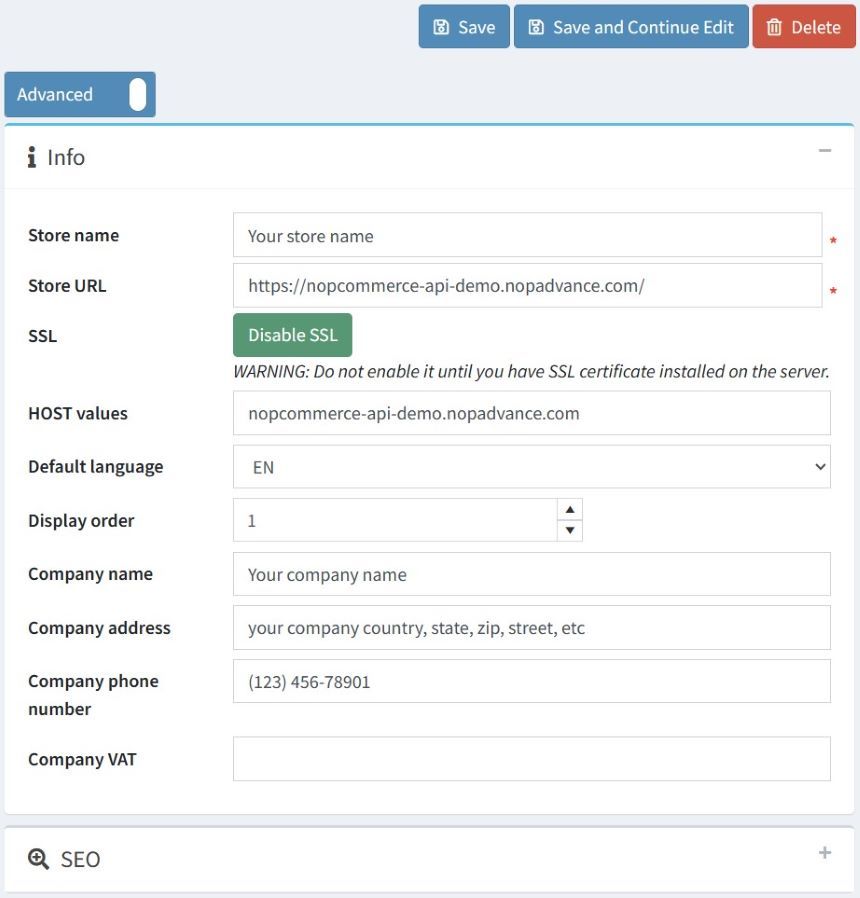
It's important to note that the Host value should consist of the domain portion only, not the entire URL path. For example, it should be formatted as 'yourstore.com'. Entering a valid URL in this field should rectify the error.