Plugin Guide - Product Offers
Buy NowThis plugin is delivered with the NopAdvance Core plugin on which this plugin is dependent. You need to install the plugin using the plugin installation guide provided here.
Once the plugin has been installed, you will see the plugin menu under NopAdvance > Plugins > Product Offers in your nopCommerce admin menu, similar as displayed in the below image.
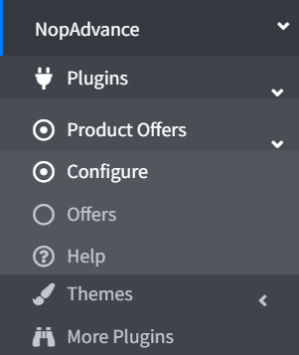
Click on the Configure menu item from the Product Offers menu as displayed above and you will be redirected to the plugin Configuration.
Once you click on the configure menu item, it will display the configuration page as shown in the image below.
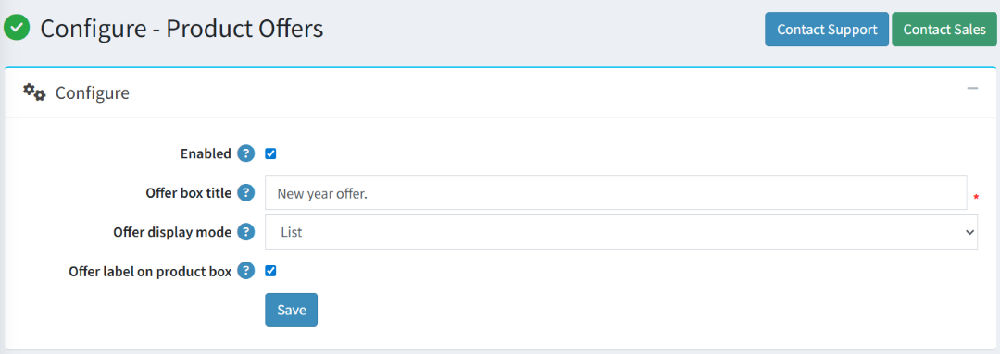
The settings from the configuration page are explained below:
- Enabled: Check this setting to enable this plugin in your nopCommerce website store.
- Offer Box Title: Define a friendly name for the Offer box.
- Offer Display mode: Select any one option from list and Slider.
- Offer label on product box: Check this setting to show an offer label on product boxes.
Product offers
Once clicked on the Offer list menu item, it will display the offer list page as shown in the image below.
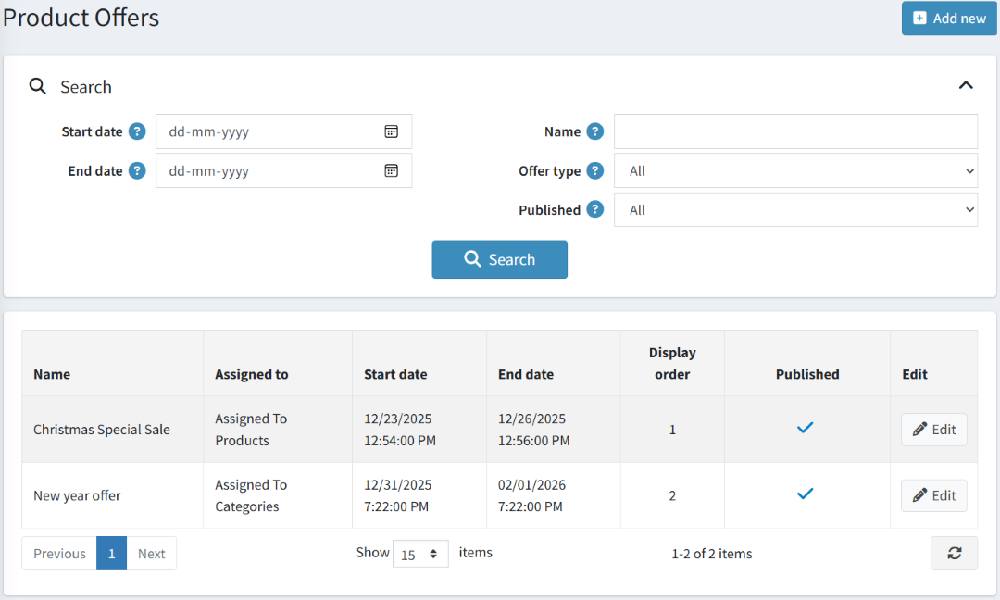
On the Offer list page, a search panel is available to search offers lists & lists of existing popup lists.
Create a new offer
Once you click on the Add New button, it will display the Add a new hello bar as shown in the image below.
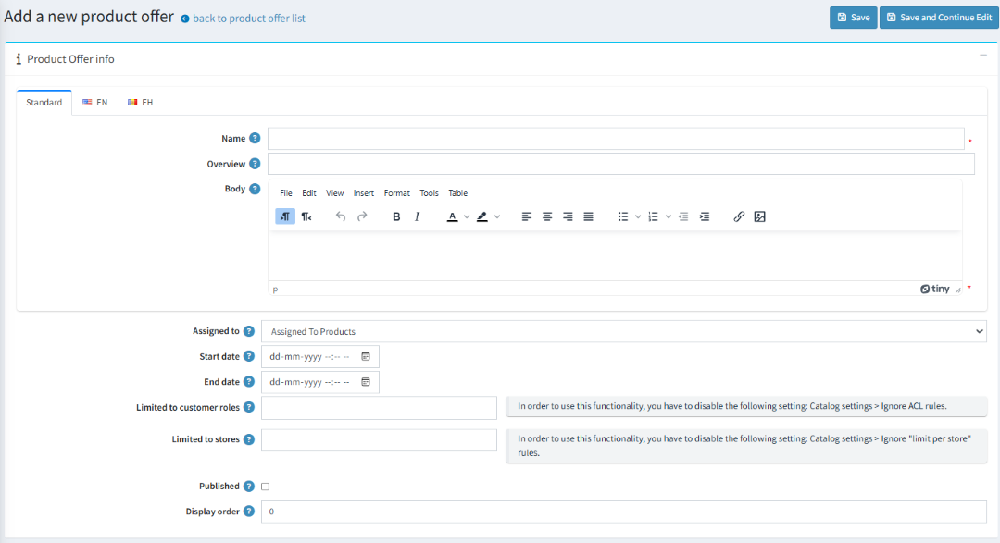
The setting for adding a new offer are explained below:
- Name: Write a friendly attractive name for the offer.
- Overview: Write a short description of the offer which will be visible with the offer title.
- Body: Write a full description of the offer which will be visible when a user clicked on the read more option.
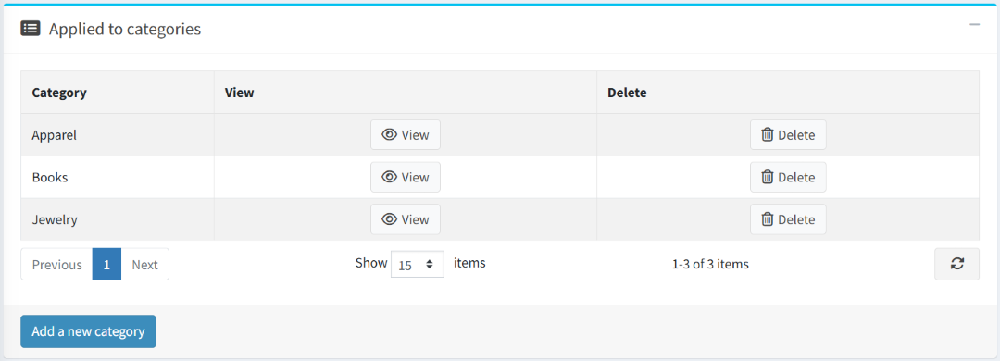
- Assigned to: Select the offer type from the given option such as assigned to products, assigned to categories, assigned to manufacturers, and Assigned to Vendors.
- Start date: Set a start date for the offer.
- End date: Set an end date for the offer
- Limited to customer roles: Select a customer role for whom you wish to display the offer.
- Limited to stores: Select any store for which you wish not to display the offer.
- Published: Check this option to publish/unpublish the offer.
- Display order: Assign display order in case of multiple offers.
- In the end, don’t forget to Save all your settings.
Storefront View: How the Offer Appears to Customers
Once the offer is created, assigned to products or categories, and published, it will automatically appear on the storefront. The offer can be displayed in two primary areas:
Offer Label on Product Boxes
If the "Offer label on product box" setting is enabled, a visual Offer label is shown on product boxes, search results, and featured product listings.

Offer Display on Product Detail Page
When a customer opens a product that has an active offer, the offer section is displayed on the product detail page.
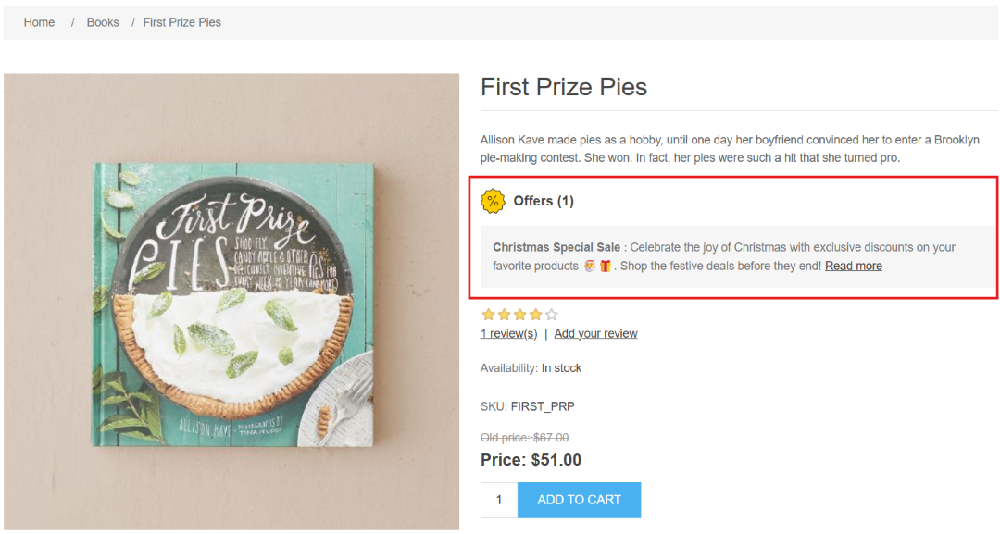
These displays help customers easily identify products that include special promotions and encourage them to explore the offer in detail.