User guide - Flexo
Buy NowThis theme is delivered with a theme plugin and NopAdvance Core plugin. Core plugin and the theme plugin must be installed in order for this theme to work properly. For that, you need to install the plugin while proceeding with the setup.
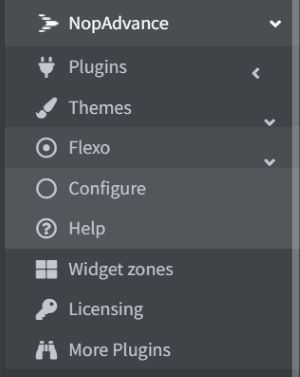
Once the plugin has been installed, you will see the menu under NopAdvance > Themes > Flexo in your nopCommerce admin menu, similar to the below image.

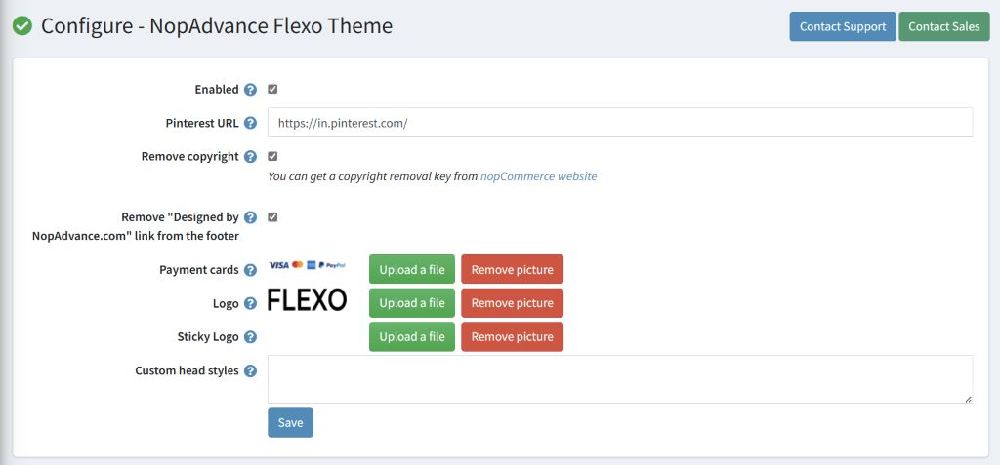
Click on the Configure menu item from the Flexo plugin menu as displayed above and you will be redirected to the plugin Configuration page as displayed below.

The settings from the configuration page are explained below:
- Enable: Select this setting to enable the plugin on your nopCommerce store.
- Pinterest URL: You can use this setting to provide your pinterest account url to be displayed in the theme footer.
- Remove copyright: Check this setting to remove nopCommerce copyright notice if you have already purchased a nopCommerce copyright removal key from here and adhere the nopCommerce license terms.
- Remove "Designed by NopAdvance.com" link from the footer: Check this setting to remove NopAdvance copyright notice if you have bought this plugin from NopAdvance store.
- Payment cards: You can replace the payment cards image which is displayed in the footer element of this theme.
- Logo: Setting logo using this setting uses the same setting as nopCommerce to set logo for your store.
- Sticky Logo: This theme uses sticky logo that can be set using this setting.
- Custom head styles: Use this setting to provide your custom styles which can be applied to the theme. This setting is provided for developers and advanced users who know how to write CSS.
Please note: All settings support multi-store configuration.