Installation and configuration - Product Customizer & Designer
Buy NowThis project is a custom plugin developed for nopCommerce, an open-source eCommerce platform built on ASP.NET Core. The plugin enhances the default nopCommerce functionality by allowing customers to customize and design products directly on the website before purchasing, such as choosing options, adding designs, or personalizing product details.
Using this plugin, customers can customize products according to their preferences, such as selecting colors, images, and design options, before placing an order. On the admin side, the plugin allows easy management of customization settings through dedicated configuration pages.
The plugin is built using nopCommerce’s standard plugin architecture, which ensures smooth integration, better performance, and easy maintenance. It follows best development practices, including modular design, database mapping, permission management, and localization support.
Overall, this plugin enhances the customer experience and gives store owners better control over product personalization in their nopCommerce store.
Installation and configuration
All our plugins require you to first install the NopAdvance.Core plugin as a prerequisite for its operation. Please refer to the instructions on how to install a plugin while proceeding with the setup.
After successful installation, a new Product Customizer and Designer menu will be available in the nopCommerce admin panel under NopAdvance > Plugins. From this menu, administrators can access and manage all customization-related settings, as shown in the image above.
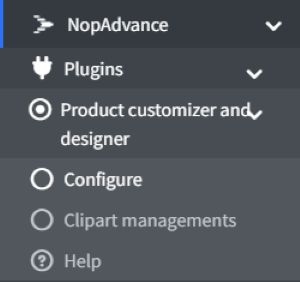
Following are the options available on the navigation menu:
- Configure: This is where you set up the plugin’s settings.
- Clipart managements: Clipart Management allows administrators to upload, organize, edit, and delete clipart images used in the product customization process. Admins can create clipart groups, assign display order, and manage the availability of each clipart item from the admin panel.
- These clipart images are displayed on the product customizer page, allowing customers to easily select and add predefined images while designing their products. This feature helps keep clipart content well-organized and ensures a smooth and user-friendly customization experience for customers.
- Help: The Help section provides documentation and step-by-step guidance on how to use the plugin.
Plugin Configuration
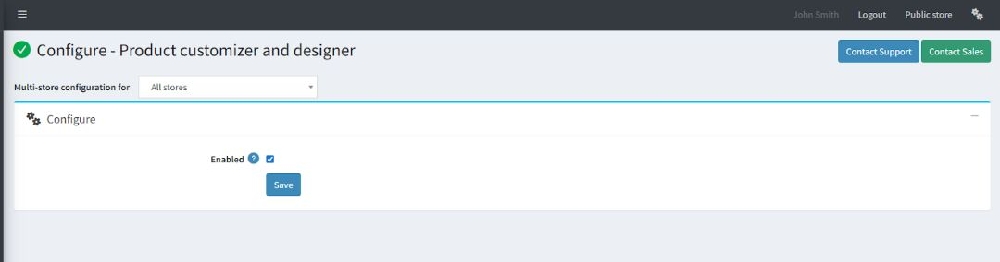
- Enabled Option → This checkbox turns the plugin on or off.
- Checked → plugin is active and working.
- Unchecked → plugin is inactive and won’t do anything.
It’s basically the master switch for the plugin.
Multi-store Configuration
If your nopCommerce site has more than one store, this dropdown lets you choose which store the plugin settings should affect.
- Select a specific store → settings only apply to that store.
- Select "All stores" → settings apply to every store in your setup.
It’s basically a way to control plugin behavior per store or for all stores at once.
Clipart managements
This is the main admin section where all clipart items used for product customization are added, organized, edited, and managed. This area allows administrators to control which clipart images are available to customers during product design.
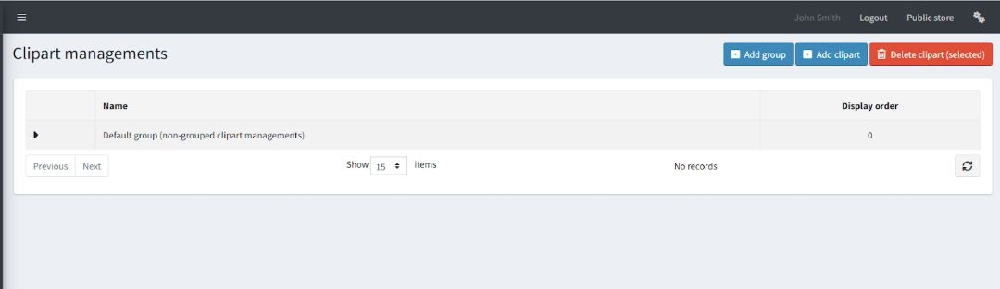
- Name: Displays the clipart group name
- Default group (non-grouped clipart managements) means cliparts that are not assigned to any custom group
- Display Order: This setting controls the sequence in which clipart groups or individual clipart items are shown in the product customizer interface.
- Add group: Create a new clipart group/category
- Add clipart: Upload a new clipart image
- Delete clipart (selected): Remove selected clipart items in bulk
Add a New Group Clipart
This screen is used to create a clipart group (category) that helps organize clipart items.

- Name: The group name shown in the admin panel and customizer (e.g., Shapes, Icons, Logos). (Required field)
- Display Order: Controls the order in which the group appears in the clipart list. Lower numbers appear first.
Add a New Individual Clipart
This screen is used to add an individual clipart image.
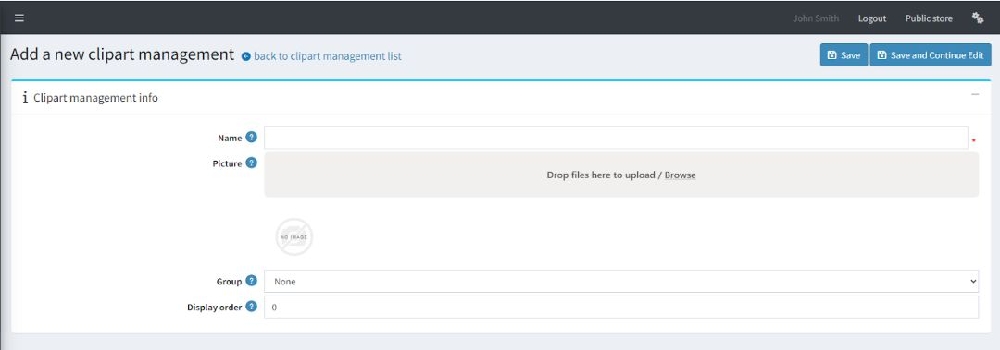
- Name: The name of the clipart displayed in the admin panel.(Required field)
- Picture: Upload the clipart image using drag-and-drop or browse option. This image will be available for customers in the product customizer.
- Group: Assign the clipart to a specific group. Selecting None places it in the default group.
- Display Order: Controls the position of the clipart within its group. Lower numbers appear first.
Clipart Items
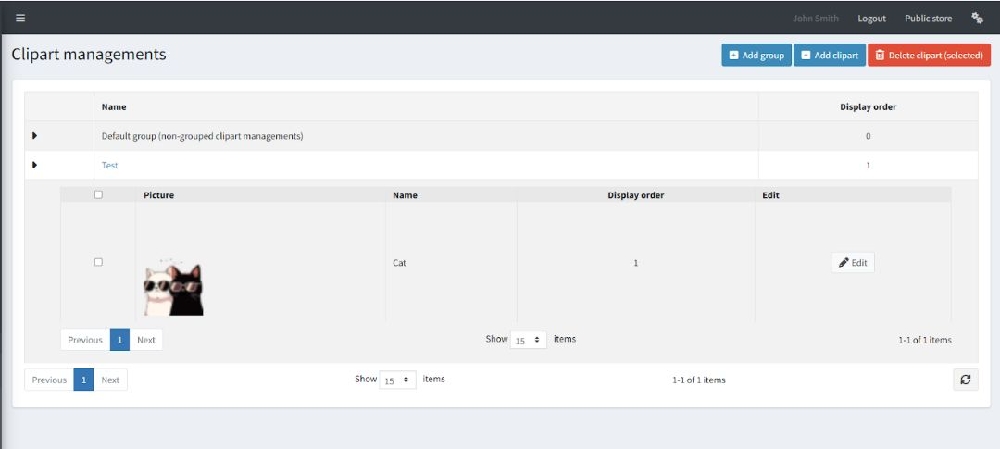
When a group is expanded, the clipart list appears with the following columns:
- Checkbox: Used to select cliparts for bulk delete.
- Picture: Preview of the uploaded clipart image
- Name: Name of the clipart (e.g., Cat).
- Display order: Controls the position of the clipart within the group.
- Edit: Open the edit page to update clipart details.
Configurable Pictures
This section allows administrators to add and manage images that customers can choose during product customization. Administrators can set the display order, title, and alternative text for each image, and decide whether the selected image configuration should be saved with the customer’s order.
Admins can manage:
- Picture display order
- Title and alternative text
- Whether the selected configuration is saved with the order
The Product Edit → Configurable Pictures panel:
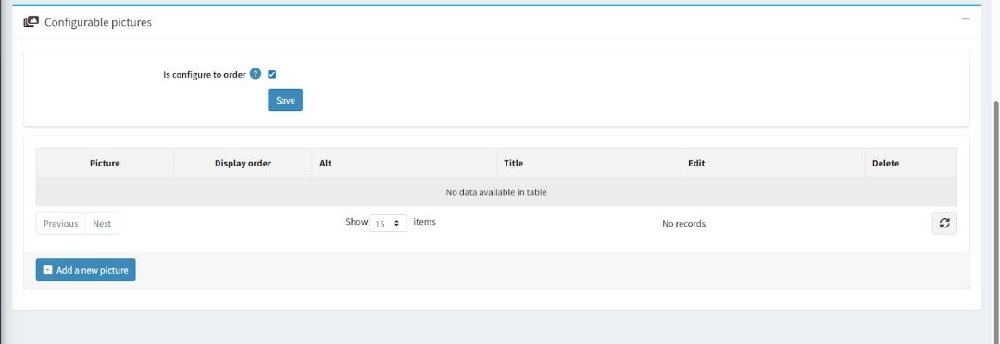
- Is configured to order: When this setting is enabled, the configurable picture list is displayed, and the selected picture configuration is saved with the customer’s order.
- Picture: Preview of the uploaded image and admin can replace the existing image if needed.
- Display order: Controls the sequence in which pictures appear.
- Alt: Alternative text for accessibility and SEO.
- Title: Tooltip or title text visible on hover.
- Edit: Modify picture details.
- Delete: Remove the picture.
Add a New Configurable picture
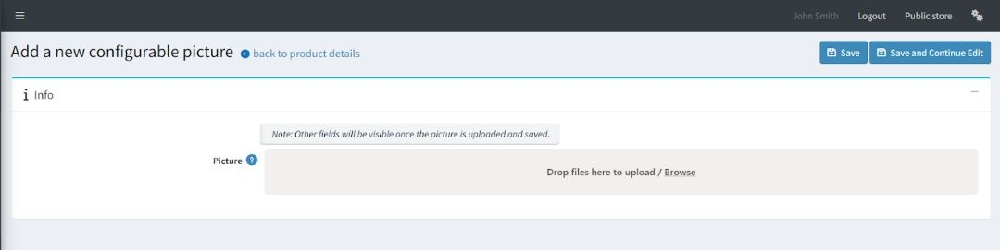
Picture: This option allows the administrator to upload an image using drag-and-drop or the browse option. The uploaded image becomes available as a selectable picture during product customization.
After the image is uploaded and saved, additional settings are displayed. Using these settings, the administrator can define and adjust the design area on the image where customers are allowed to add text, clipart, or other design elements.
Note message:
“Other fields will be visible once the picture is uploaded and saved.”
This means additional fields (such as display order, title, alt text, or configuration options) will appear after the image is saved.
Edit Configurable picture
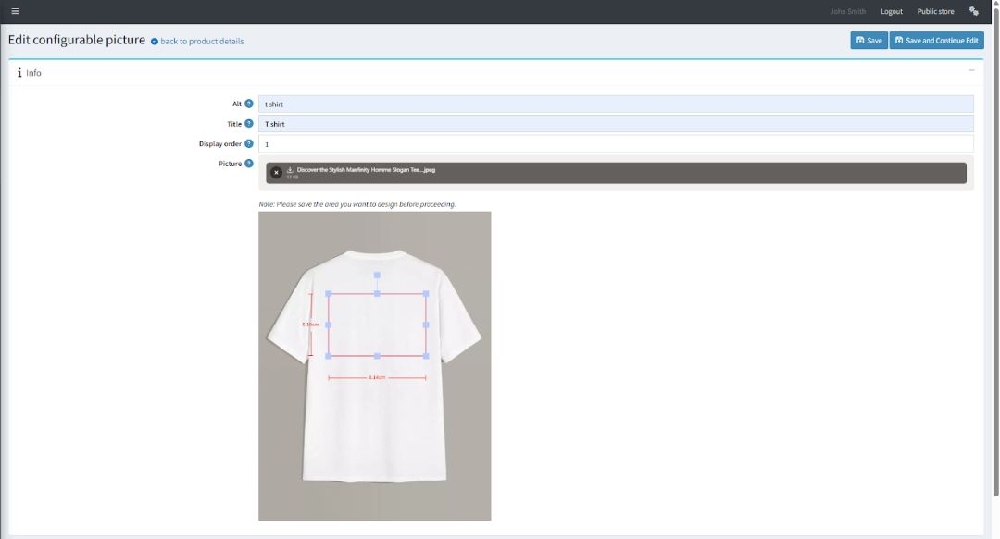
- Alt: Alternative text for the image, used for accessibility and SEO.
- Title: Display title shown as tooltip or label in the customization interface.
- Display order: Defines the order in which this picture appears in the configurable picture list.
- Picture: Shows the currently uploaded image. The image can be replaced if required.
Design Area Configuration
- Design area selection: The highlighted rectangular area on the product image represents the print/design area where customers can add text, clipart, or designs.
- Resize & reposition controls: The blue handles allow the admins to adjust the size and position of the design area using resize handles.
- Measurement indicators: Red measurement values (width and height) display the exact size of the design area, ensuring accurate placement for printing.
Note message:
“Please save the area you want to design before proceeding.”
This reminds the admin to save the configured design area before moving forward.