Installation and configuration - Advanced Wishlist
Buy NowAll our plugins require the NopAdvance.Core plugin to be installed first, as it is a prerequisite for proper functionality. Please follow the plugin installation instructions before proceeding with the setup.
Once installed, the Advanced Wishlist menu will be available under NopAdvance > Plugins > Advanced wishlist in your NopCommerce admin panel, as shown below.
Plugin Configuration
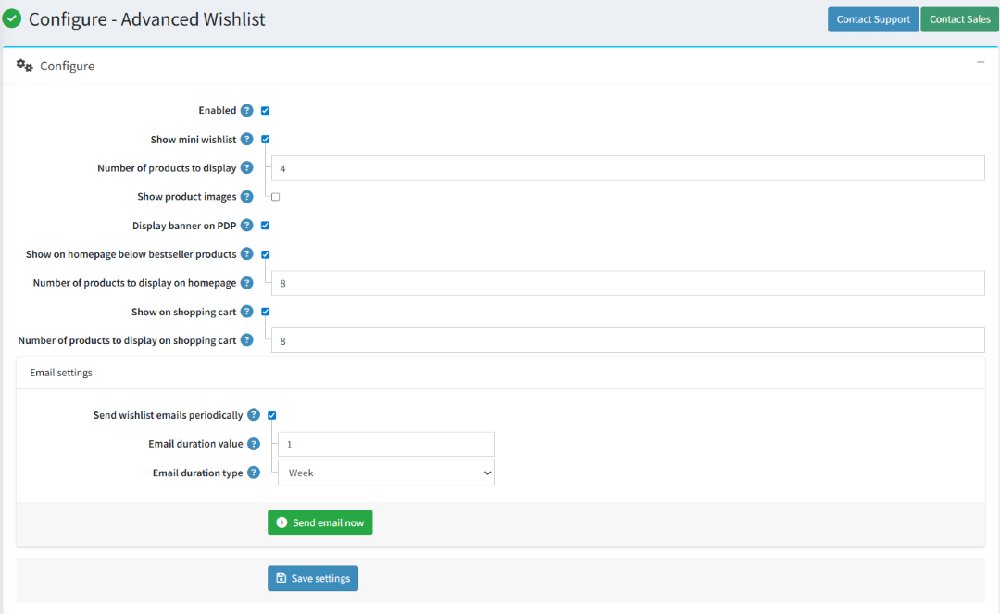
Selecting the Configure menu item will bring up the configuration page, as shown in the image below.
- Enabled: Allows store owners to enable or disable the Advanced Wishlist plugin.
- Show mini wishlist: Displays a mini wishlist widget for quick access to saved products.
- Number of products to display: Defines how many products appear in the mini wishlist.
- Show product images: Enables or disables product image display in the wishlist for better visual clarity.
- Display banner on PDP: Shows a wishlist banner on the Product Details Page (PDP) to encourage customers to save products.
- Show on homepage below bestseller products: Displays wishlist items on the homepage below bestseller products to increase visibility and engagement.
- Number of products to display on homepage: Controls how many wishlist products are shown on the homepage.
- Show on shopping cart: Displays wishlist items on the shopping cart page for easy access and conversion.
- Number of products to display on shopping cart: Defines how many wishlist products appear on the shopping cart page.
Email Settings
- Send wishlist emails periodically: Enables automated reminder emails to customers about their saved wishlist items.
- Email duration value: Specifies the interval value for sending wishlist reminder emails.
- Email duration type: Defines the interval type (e.g., day, week, or month) for wishlist email notifications.