User guide - Nexico
Buy NowInstallation & Configuration
This theme is delivered with a theme plugin and NopAdvance Core plugin, and both plugins must be installed in order for this theme to work properly.
Please see the plugin installation guide before proceeding with the theme setup. We recommend configuring the theme plugin before you select nexico as your store working theme.
Once the theme plugin has been installed, navigate to NopAdvance > Themes > nexico in your nopCommerce admin menu, as shown in the below image.

Clicking on the Configure menu item will redirect you to the plugin configuration page as displayed below.

The settings from the configuration page are explained below:
- Enable: Check to enable the plugin for your nopCommerce store. Please note, some theme features may not work properly unless the plugin is enabled for the store where this theme is being used.
- Pinterest URL: Provide your Pinterest URL to display “Pinterest” icon in the website footer, otherwise leave blank.
- Remove copyright: Check to remove the nopCommerce copyright notice only, if you have already purchased a copyright removal key from here and adhere to the nopCommerce license terms.
- Remove "Designed by NopAdvance.com" link from the footer: Check to hide developer credits for NopAdvance in your website footer.
- Logo: Define the store logo.
- Footer Logo: Upload the image that will be displayed in the footer section of your website.
- Custom Head Styles: Add custom CSS styles that will be included in the <head> section of the site. These styles will override existing CSS files if there are conflicts.
- Enable Blogpost Image: Allows you to display images associated with blog posts on the frontend.
- Enable Newsitem Image: Allows you to show images related to news items on the frontend.
Header Notification Section
This section allows the admin to upload a custom notification icon and set a title that appears in the website header. It is typically used to highlight key updates like sales, offers, or announcements. You can see the image below displaying the Header Notification settings layout.
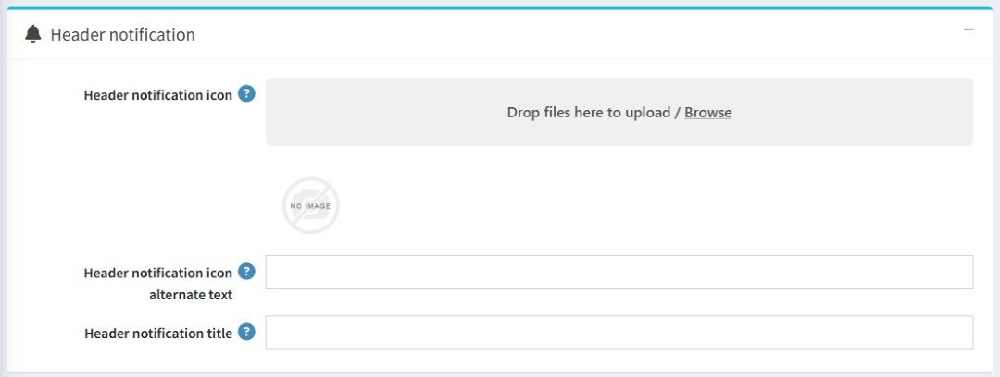
- Header Notification Icon: Upload an icon that will be shown in the site’s header area as a notification symbol.
- Header Notification Icon Alternate Text: Enter text that will be used as the alt text for the icon image. This is important for accessibility and SEO.
- Header Notification Title:The title text that will be displayed in the header.
Info Box Section
This section enables the admin to configure up to four info boxes, these boxes are shown on the store frontend based on the selected widget zone.
You can see the image below displaying the Info Box configuration layout.
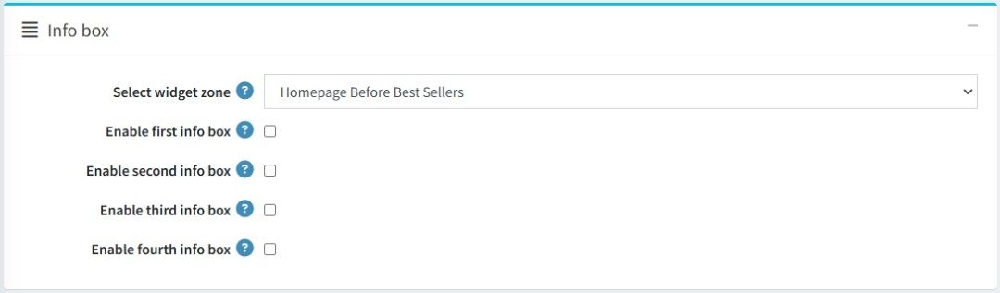
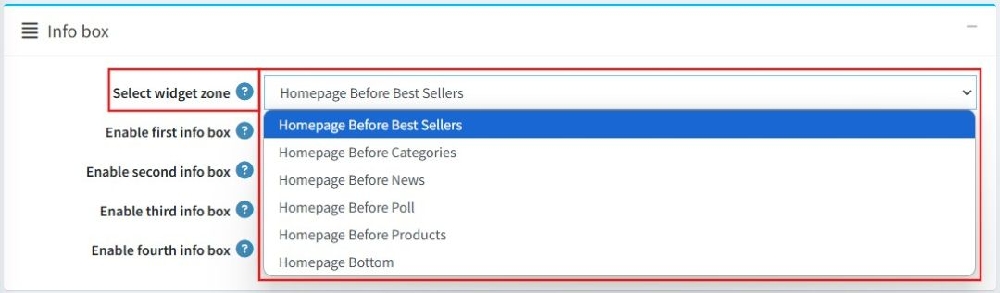
- Select Widget Zone :Choose where the info boxes should appear on the site by selecting a widget zone.
- Enable First Info Box: Check this box to show the first info box on the site & selected widget zone.
- Enable Second Info Box: Check to show the second info box on the selected widget zone.
- Enable Third Info Box: Check to show the third info box on the selected widget zone.
- Enable Fourth Info Box: Check to show the fourth info box on the selected widget zone.
Note:
- All settings support multi-store configuration.
- Features of this plugin will only work with the nexico theme from NopAdvance.